How to Develop Android Apps on a Chromebook in 2020
Published: August 9, 2020

By Anthony
5 min read
Developing Android Apps on a Chromebook haven't been easier in 2020. I tested this out on a HP x2 Chromebook, but I would recommend a better machine. Mobile development generally requires a pretty good machine (like an i5 Pixelbook Go) in order to compile and build the project quickly. Check out my list of Best Chromebooks for Programming if you're not sure which Chromebook to use. If you already have a Chromebook, make sure the device is compatible with Crostini since this tutorial assumes you're using Crostini.
Make sure you follow the steps in Setting Up Java, Python, Node, React, and Angular on a Chromebook to set up Crostini. You'll only need to follow the steps under "Set up Linux (Crostini) on your Chromebook". Once that's complete, come back to this tutorial.
Setting up Android Studio to write native apps on a Chromebook is relatively simple, you'll just need to download Android Studio.
Get started by downloading Android Studio. You'll find the .deb file under your Downloads folder. Double click it in order to install it.
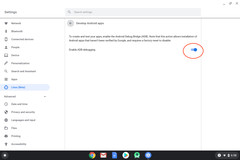
Since the Chromebook can run Android apps, you can actually build and run the Android app on the Chromebook itself. In the settings app, go to the linux section.
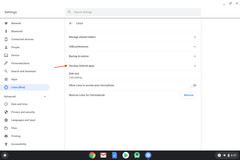
Click the "Develop Android Apps" section and toggle the feature on. You'll need to reboot the device to activate the feature.
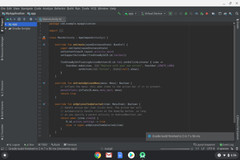
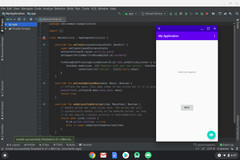
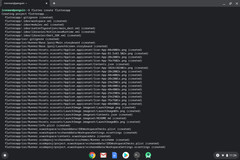
After enabling ADB, you can create a sample project in Android Studio and run the app. It took almost 20 minutes for Gradle to complete the very first build. I suspect this has to do with my Chromebook having 4GB of RAM. If everything is setup correctly, you'll see the Android app running like the screenshot below.
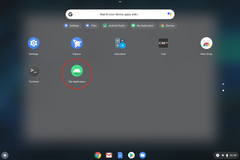
You'll also see the Android app will appear in your App Tray.
After testing out Android Studio for native Android development, I was curious to see if you could use Flutter on a Chromebook as well and it turns out you can. Flutter is a framework that lets you write a mobile application once and it will generate an iOS and Android app. Flutter recently got support for Web as well, but it's still in beta. Make sure you follow the steps to set up Android Studio or else this won't work. You can find the official doc for installing Flutter here.
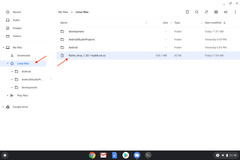
First download the Flutter SDK by clicking on this link. Make sure you move the SDK from your Downloads folder to your Linux files folder.
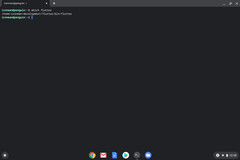
After you download the SDK, open up your terminal and type in the following commands. This will extract the binary.
mkdir development
cd ~/development
tar xf ~/flutter_linux_1.20.1-stable.tar.xz
Next open up your ~/.bashrc file and add the following code to it. This will make it easier to run the flutter commands whenever we have a new terminal instance. If you already have a PATH export, add it to the existing PATH export.
export PATH="$PATH:`pwd`/development/flutter/bin"
After updating the ~/.bashrc file, make sure to run source ~/.bashrc.
Run the following command to verify you installed Flutter correctly.
which flutter
You should see something like /home/ironman/development/flutter/bin/flutter printed to the terminal. If nothing is printed then you most likely made a mistake earlier.
Run the following commands to make sure we get all the requirement dependencies. Running flutter doctor will verify your environment and make sure you have everything needed to run Flutter properly. When you run flutter doctor --android-licenses, you'll need to accept a couple of licensing agreements.
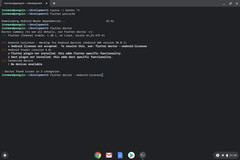
flutter precache
flutter doctor
flutter doctor --android-licenses
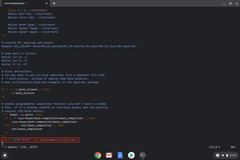
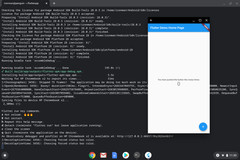
After running those commands, you'll see running flutter doctor outputs something like the screenshot below. Don't worry if you see an exclamation mark by Android Studio.
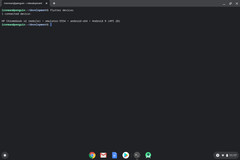
Also make sure you have ADB setup correctly by running flutter devices. You'll see your device's name printed in the terminal.
I presonally don't like using Android Studio since it's a memory hog so I use VSCode instead. Make sure you download the .deb file instead of the .rpm file. After installing VSCode, install the Flutter Extension.
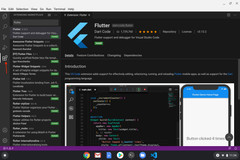
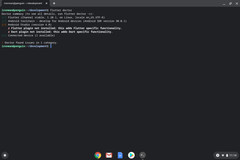
Flutter makes it super easy to create a new project. Just run the following command in the terminal and it'll automatically generate a new project.
flutter create flutterapp
cd flutterapp/
flutter run
After running flutter run, you'll see the sample app after the project successfully builds. Unfortunately, you won't be able to test out the iOS counterpart unless you have a Mac since you need xCode which is exclusive to MacOS.
There you have it! You're now ready to make native Android apps and Flutter apps on your Chromebook. If you enjoyed this article please leave a comment in the comments section below.
All products recommended are selected by our team. If you buy something through one of the links on this page, you'll be supporting our team to keep doing what they love.